Oyster Clouds setup process is designed to be quick, easy and flexible. We offer three setup options the first and most commonly selected involves us organizing a time to come out on your farm and map your leases and do a complete stock take if required. This processes generally takes 2 to 3 days depending on farm size and includes on site training in the use of all features.
The second option is a phone/email setup where the farmer maps out all there leases on paper and emails that to us, we then set the account up based on this information and provide online and over the phone training and support.
The Third option is a self setup option. We provide online training and phone support but the farmer builds all the leases and inputs stock into the system.
In this video Matt will walk you through setting up a simple Oyster lease, adding some rows and moving them into position on the lease map. He also shows how to delete a row and change a rows capacity. A simplified Text and image version of this guide is available below the video. More detailed tutorials are available to all members.

Add a Lease
Select the Main menu button at the top of the screen.
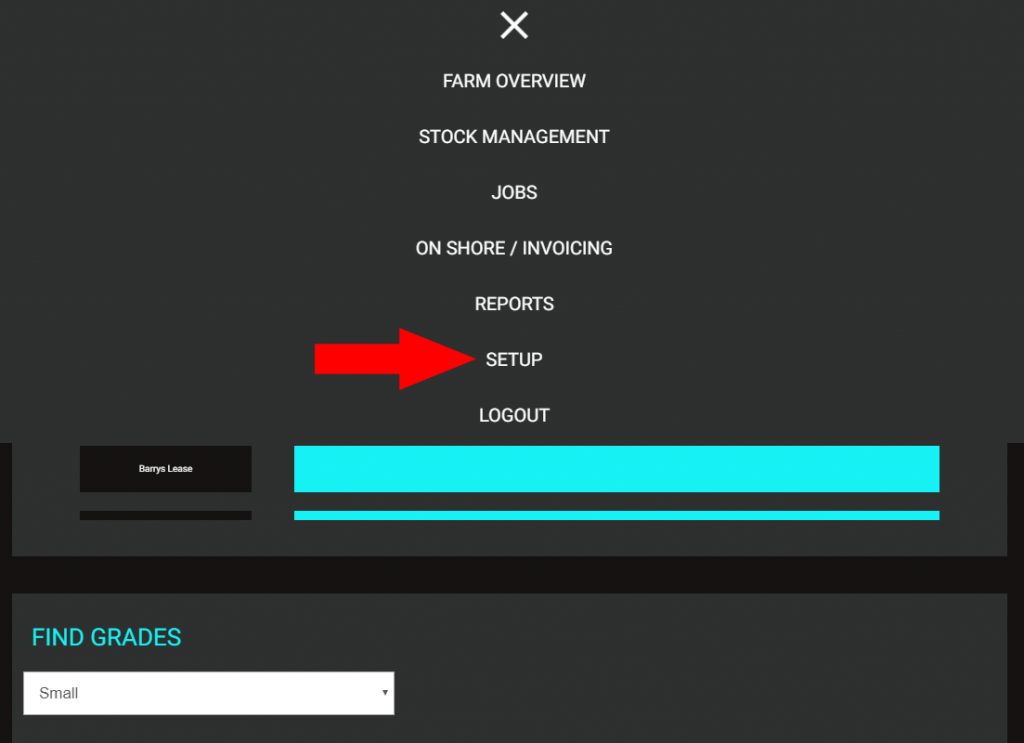
Select the Setup option.
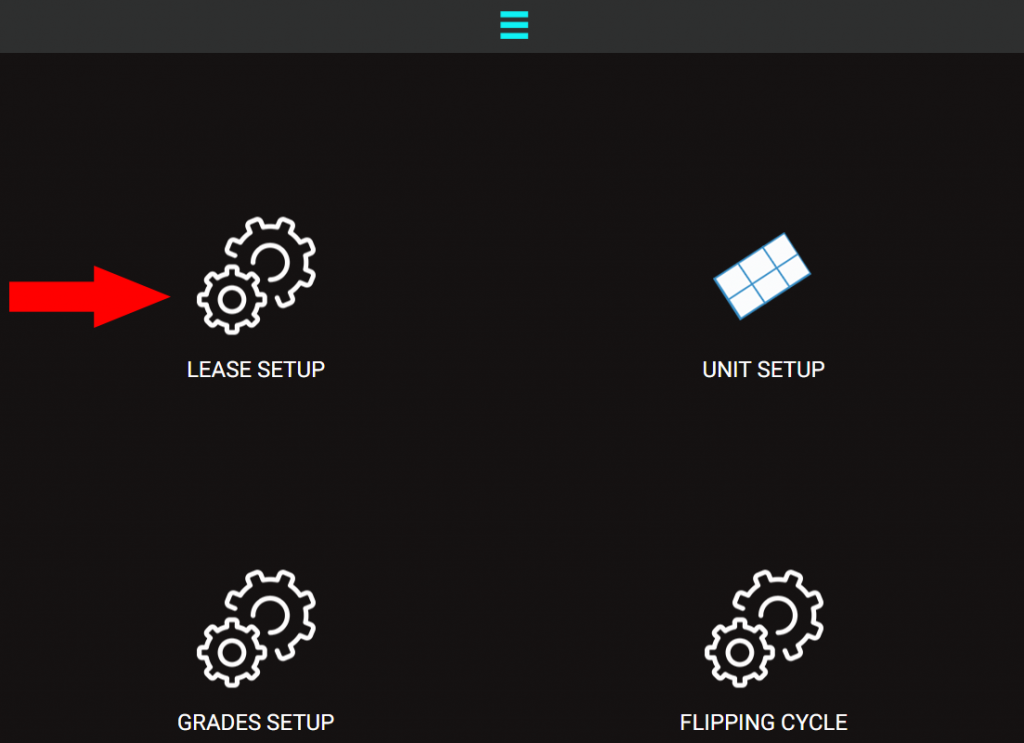
Select Lease Setup.
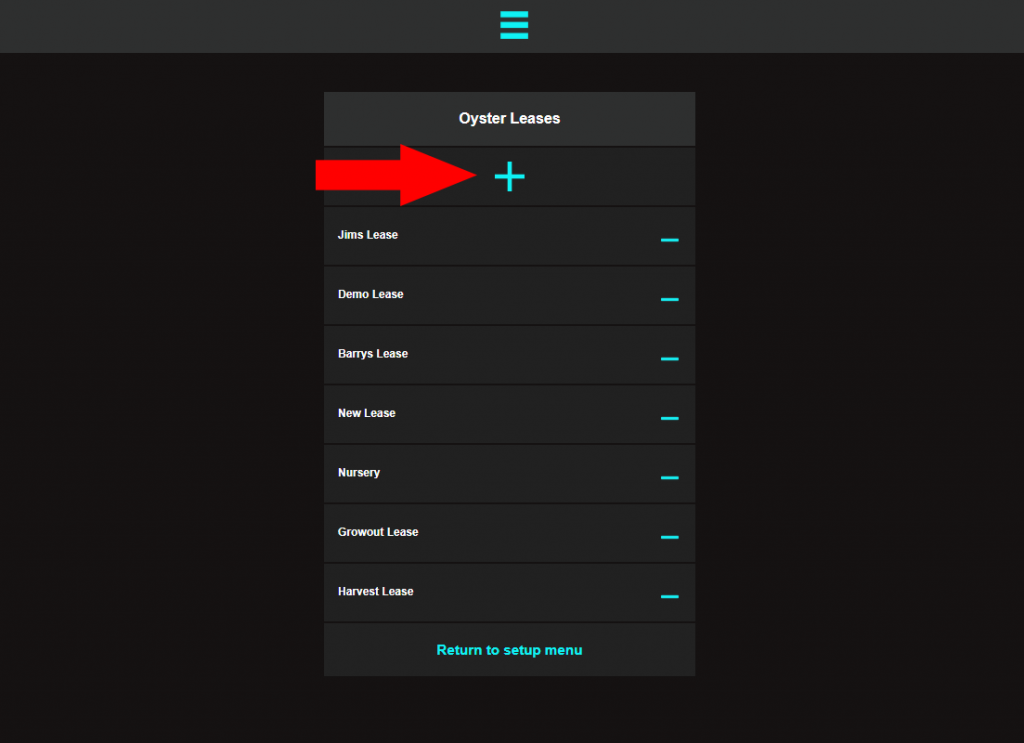
Click the “+” button at the top of the lease list.
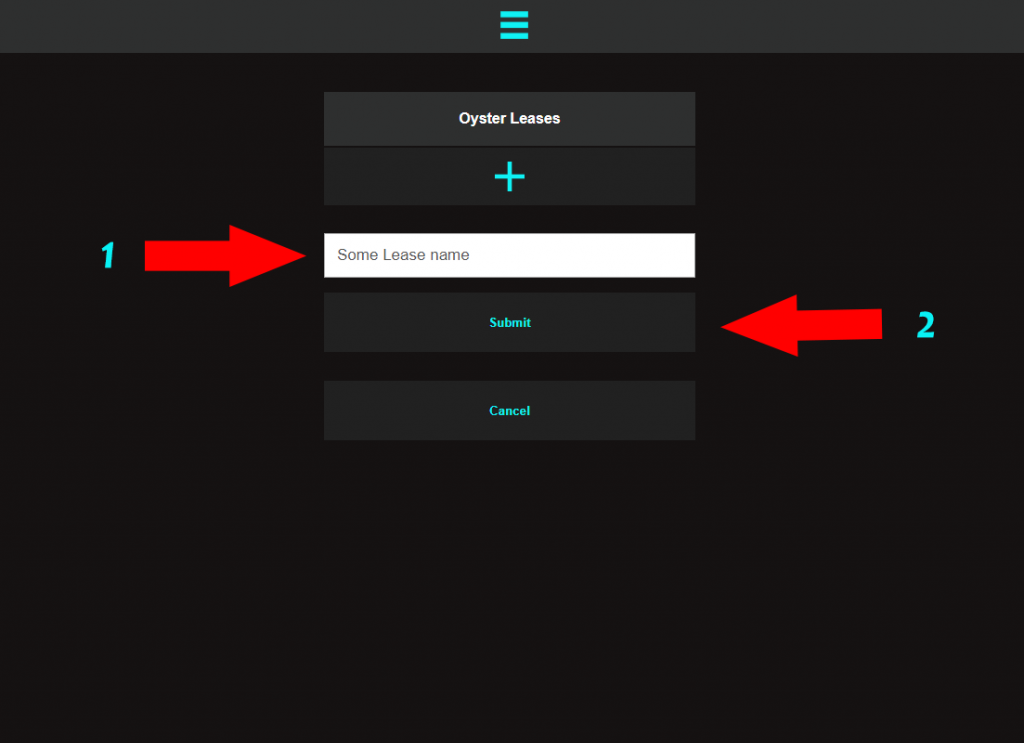
Give the new lease a name. When you are happy with the lease name click on submit.
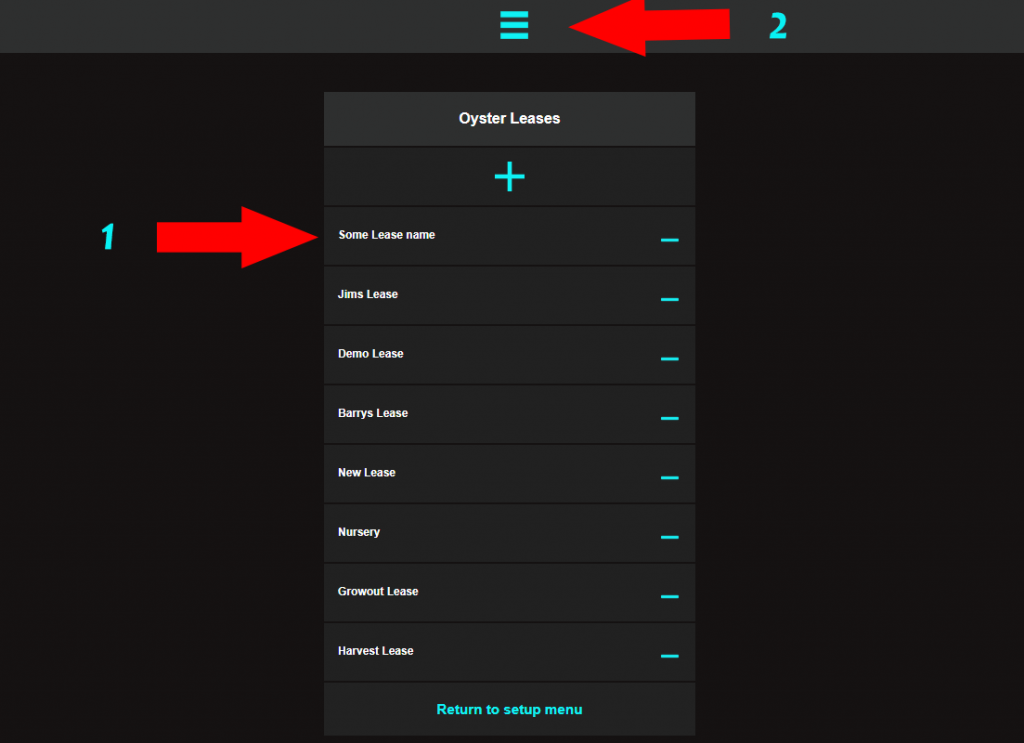
Check that the new lease has been added to the lease list and then go to the main menu.
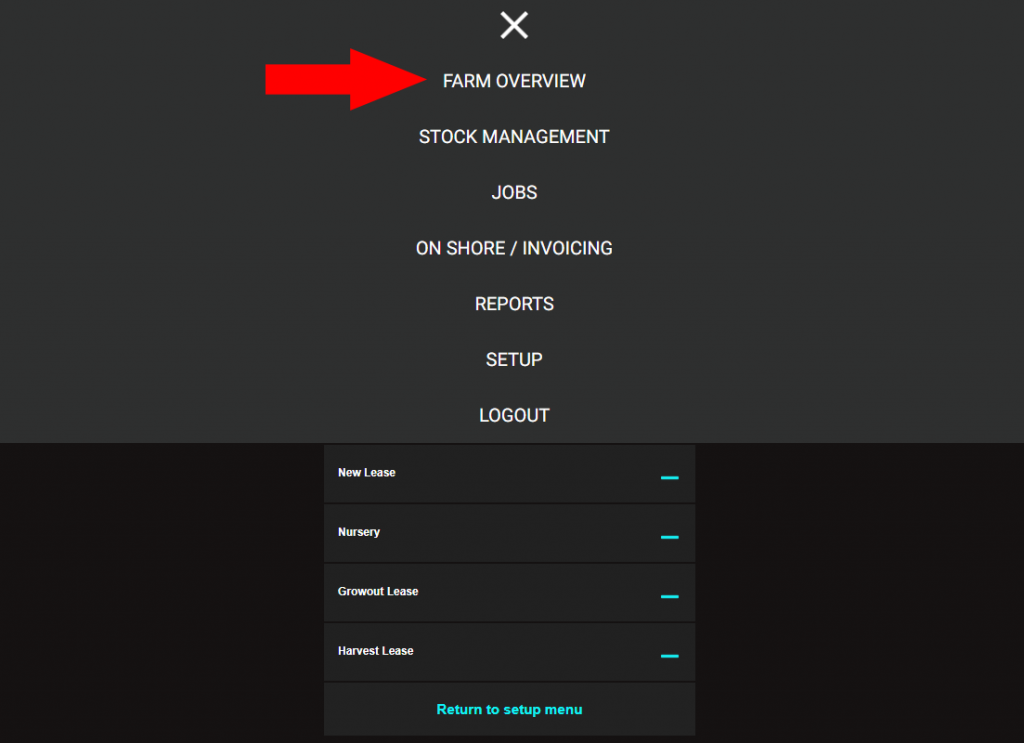
Go back to Farm Overview.
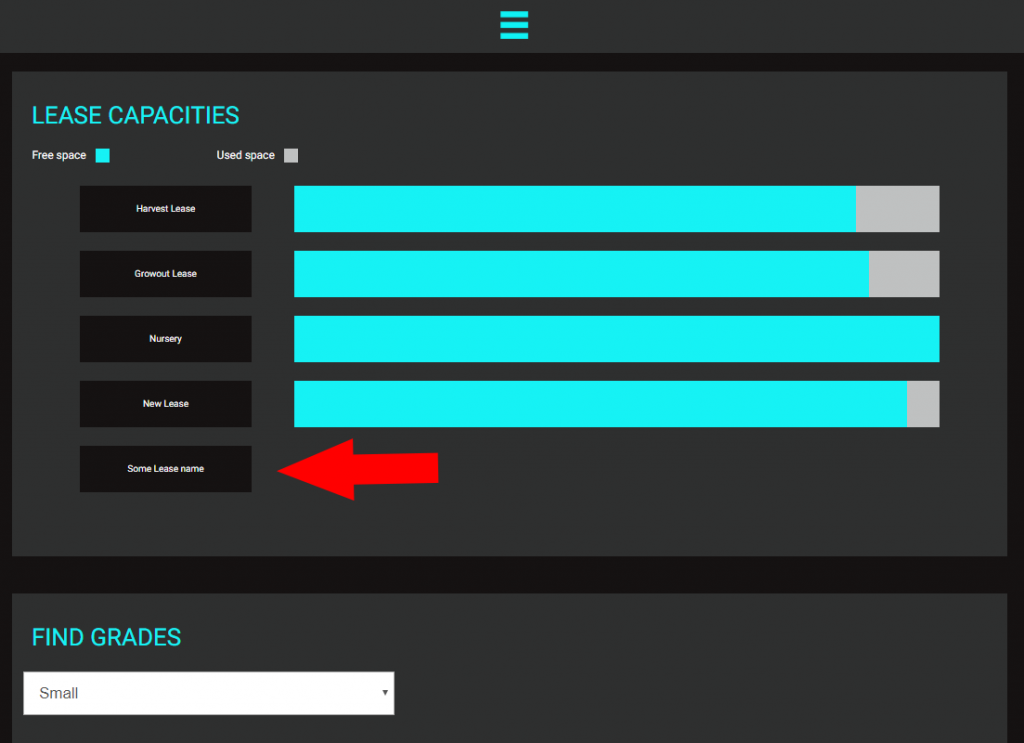
Select the new Lease in the lease list under Lease Capacities. Note the missing bar graph for this lease as it does not yet have any infrastructure.
Add and edit rows
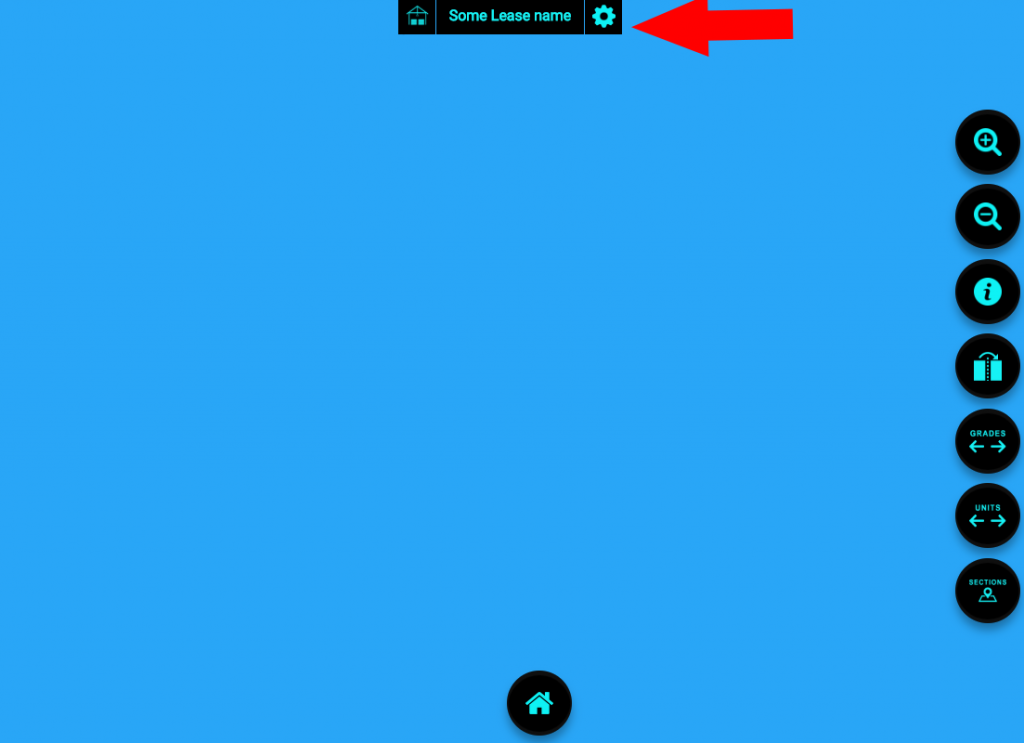
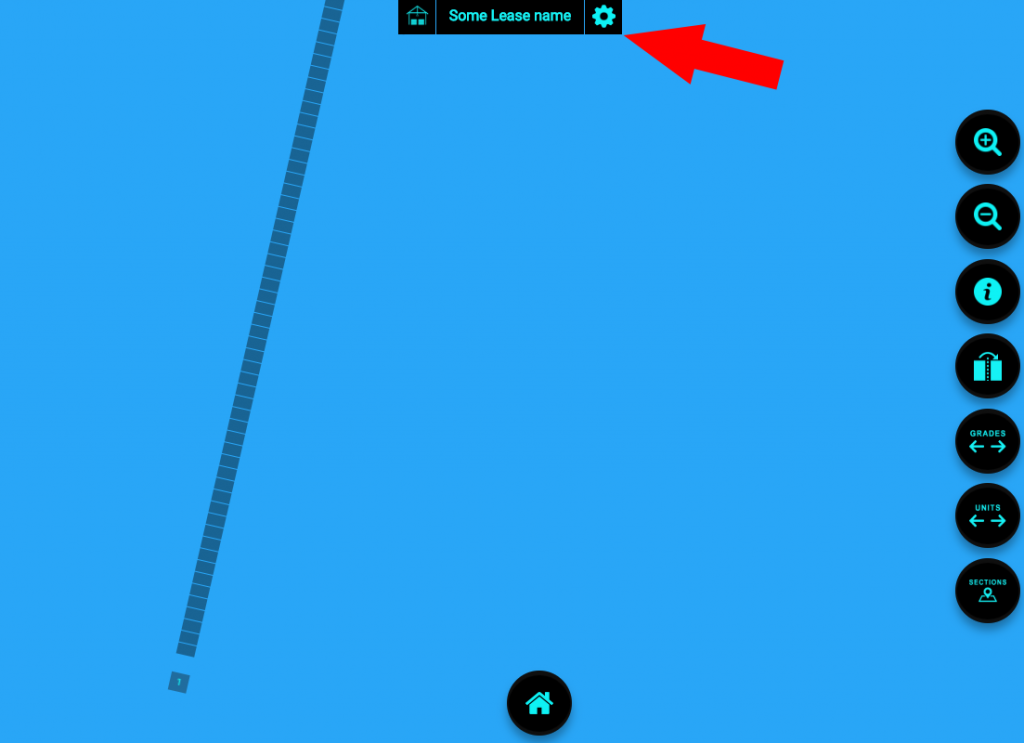
Click on the Lease editor icon.
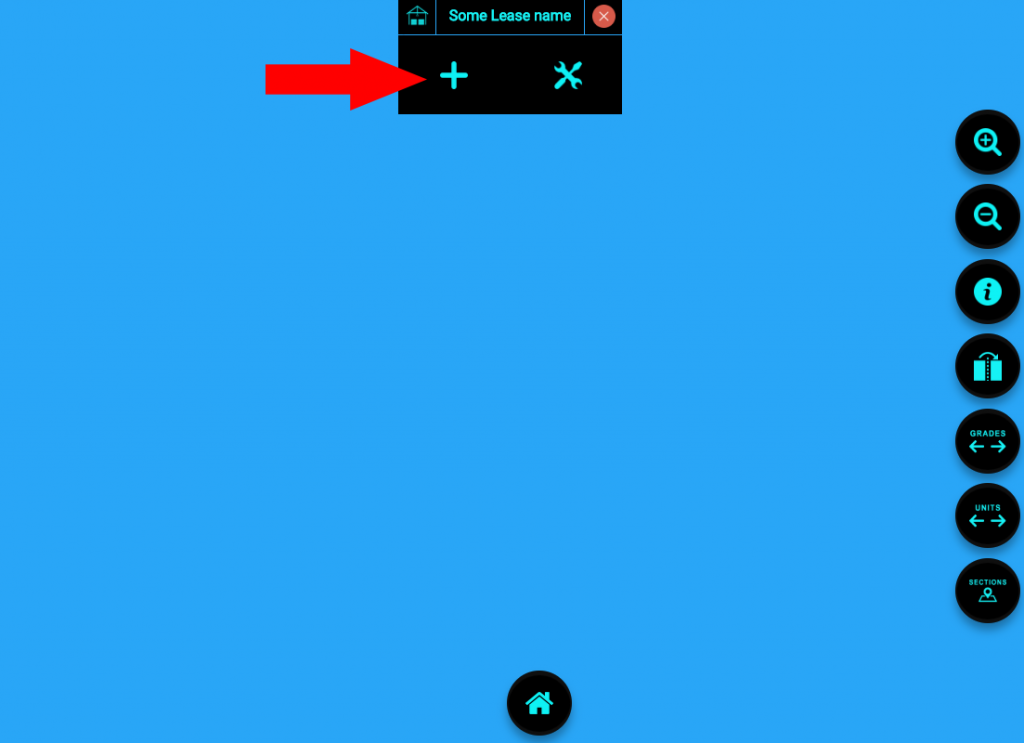
Select the Add rows icon “+”.
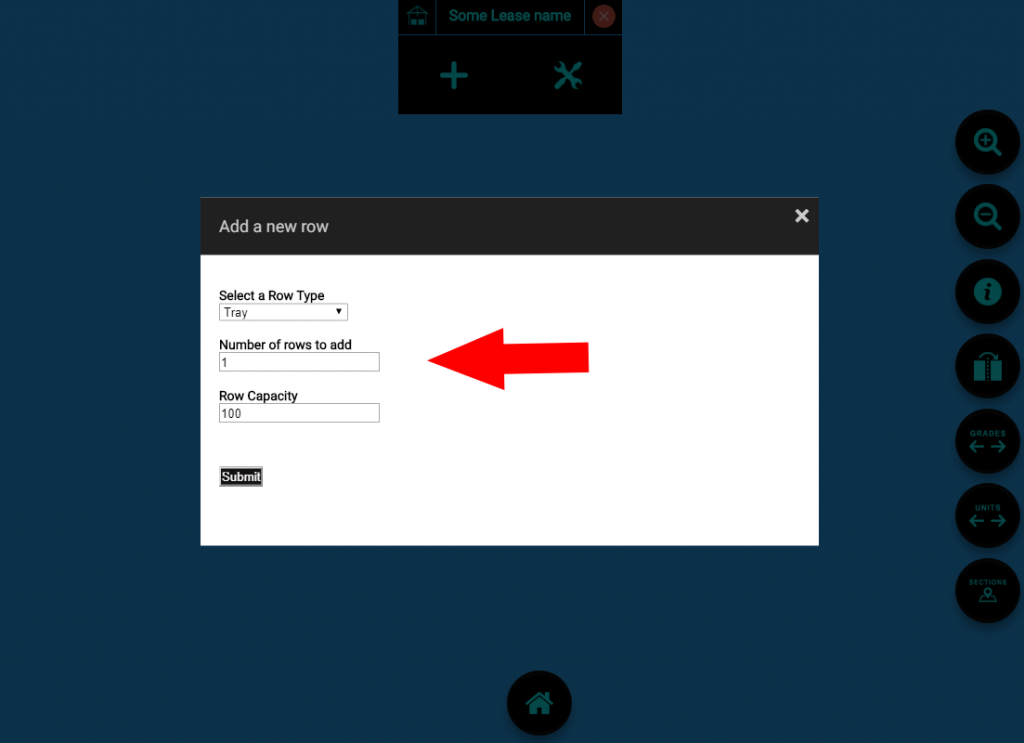
Select a row type and enter 1 into number of rows, also don’t forget to select a row capacity. When you are happy hit “Submit”.
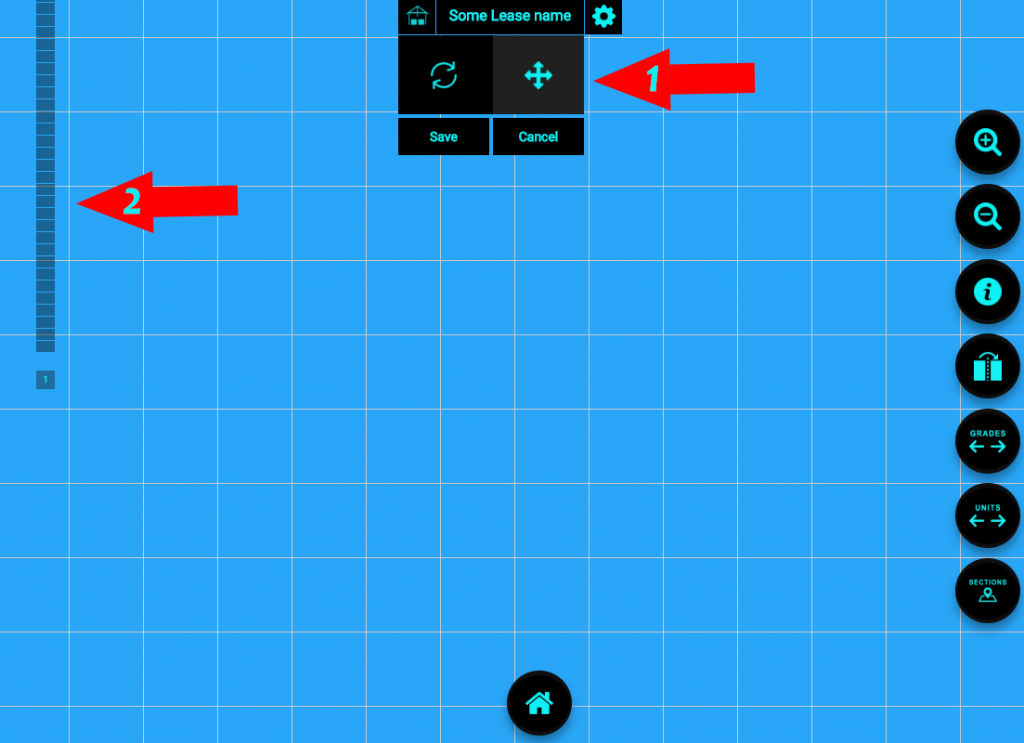
Click on the Lease editor Icon then the Edit rows Icon followed by the Move rows Icon. Click and hold or Touch hold on the row and drag it with the mouse or your finger into position.
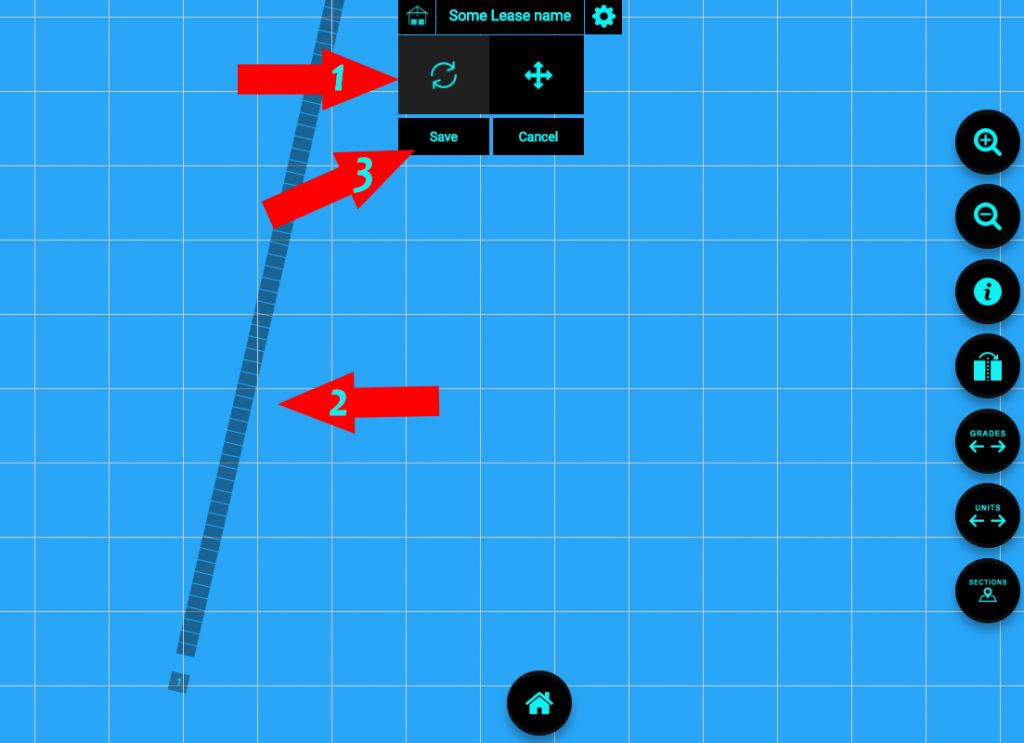
Select the Rotation Icon to rotate the row. You can switch between Rotate and Movement. Click and drag the row to select the desired angle. Click on Save when you are happy with the row.
To add more rows Select the Lease editor Icon again.
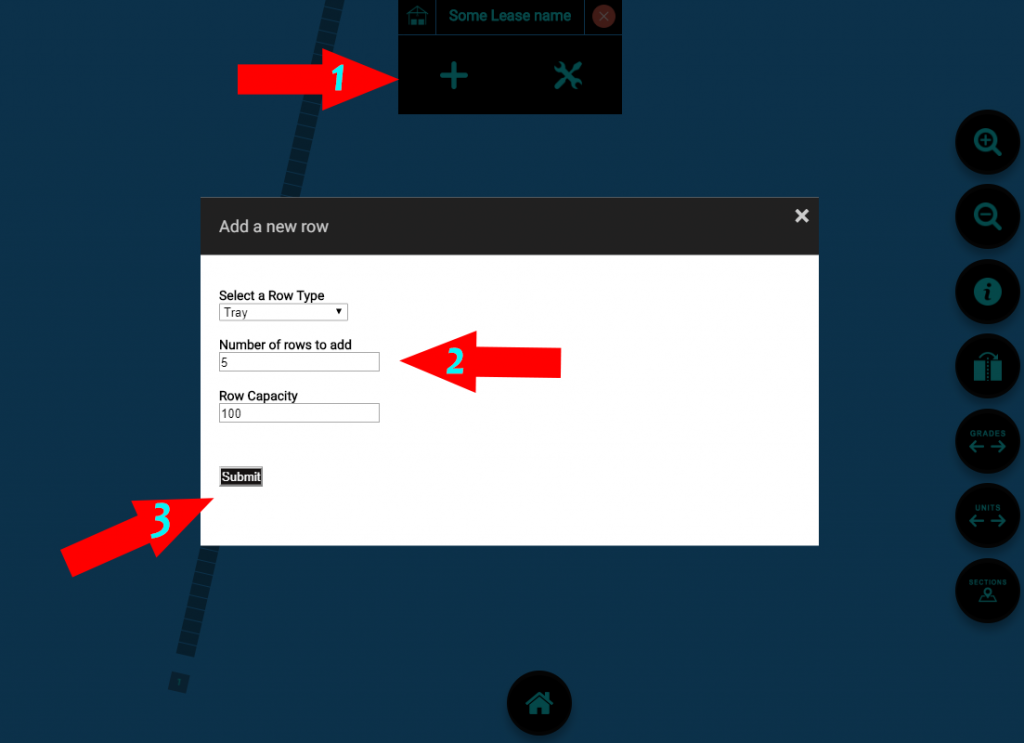
Select the Add Rows Icon and add 5 more tray rows as shown in the image then Submit the form.
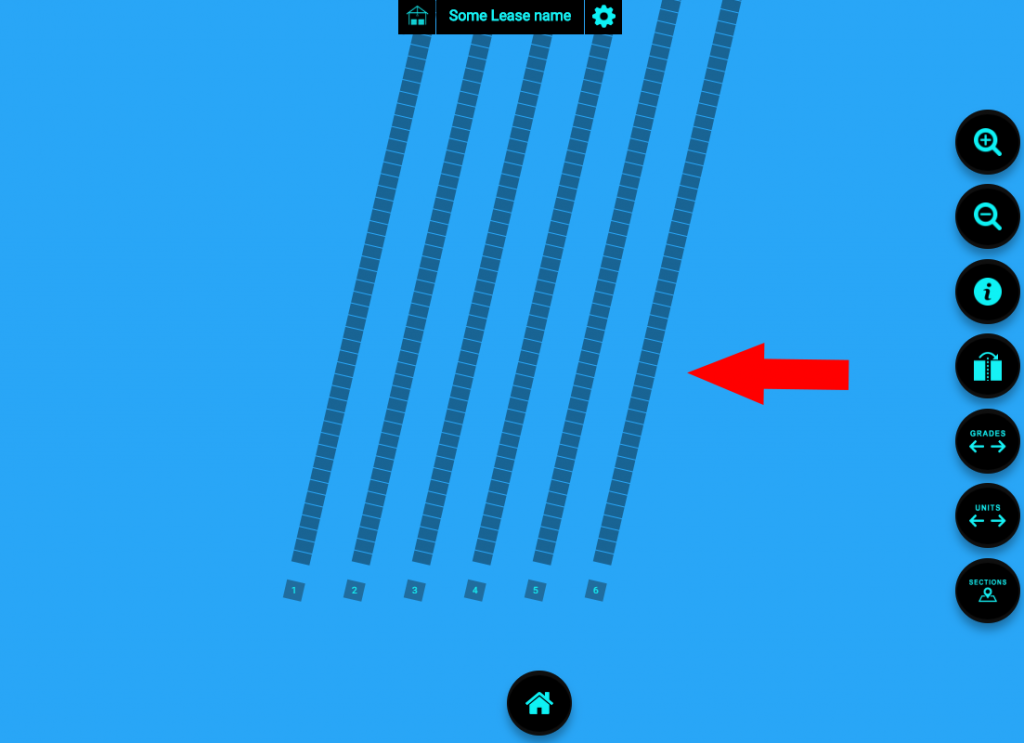
The new rows will appear spaced out next to the existing row. You can move and rotate these rows as needed.